K-Tip hair extensions are a popular choice for adding length and volume to natural hair. You’ve probably met someone with K-Tip extensions, but we bet you didn’t notice because the hair looked so natural.
Today, we’ll tell you what else K-Tip hair extensions have to offer. We’ll discuss what they are, their pros and cons, and lastly, how to properly maintain them. Let’s begin!
What Are K-Tip Hair Extensions?
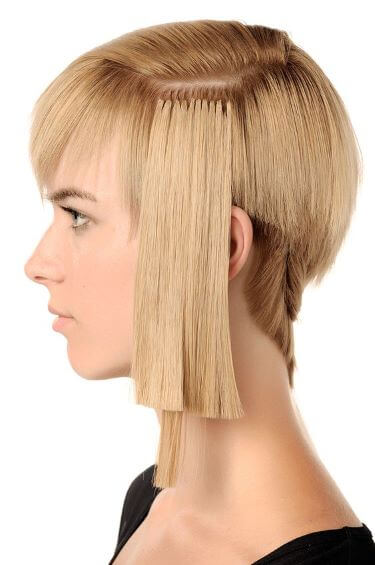
K-Tip hair extensions, also known as K-Tips, are single strands of hair extensions that join to your hair at the tip with a Keratin bond. K-Tips are applied by melting the Keratin tip, which allows your hair and the extension to fuse together.
K-Tip extensions are partly made using Keratin, the protein that aids in hair formation. The remainder of the extension can be made of human or synthetic hair in a variety of lengths, textures, and colors.
K-Tip extensions are attached strand by strand. When heated, the Keratin bonds melt and stick to your natural hair semi-permanently. Since Keratin is already present in your hair, the result is a smooth mix that allows for 360-degree mobility of your hair.
Apart from the Keratin component, K-Tip extensions are famous for their lightweight nature. The tips are fairly little, and the overall weight is the same as that of normal hair, thus natural hair is put under less strain.
Pros of K-Tip Hair Extensions
K-Tip hair extensions offer a wide range of benefits. They include:
1. Comfort and Realism
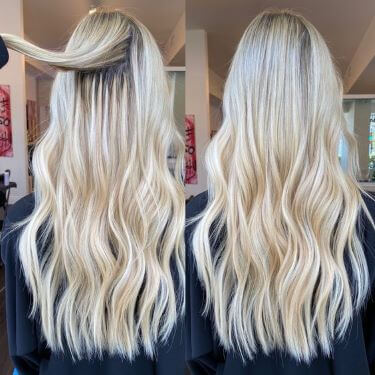
K-Tip extensions are some of the most natural-looking hair extensions. The Keratin bonds perfectly fuse with your hair, and the tips are super discrete, making them unnoticeable. To make them more discrete, consider getting tips that match your hair color.
The extensions are also rather light, making them a safe option for those with thin hair. If installed properly, K-Tip extensions can offer the most comfortable and realistic look.
2. Durability
The Keratin bond fuses with your hair to form a natural look that’s more durable than most hair extensions. With proper care and maintenance, you can wear your K-Tip extensions for 3–5 months.
3. Versatility
K-Tip extensions are very flexible and can accommodate almost all hair types. They come in varying lengths, colors and textures, giving you the freedom to create something that fits your needs.
You can go for longer extensions if your hair is short, get curled ones if you need a break from straight hair or play around with the colors to spice up the look—no wonder it’s a favorite choice for celebrities.
4. Minimal Hair Damage
When it comes to hair damage, K-Tip extensions are almost risk-free. They contain Keratin, the same substance that helps in hair formation in your body, making it a safer option than most hair extensions.
In addition, K-Tip extensions are generally light, which means your natural hair is not subjected to excessive strains.
Cons of K-Tip Hair Extensions
While K-Tip extensions offer safe and flexible styling options, they also come with a few challenges.
1. Difficult to Install
Installing K-Tip extensions can be quite challenging. Since they attach strand by strand, a full head installation can take 3–5 hours to complete. In addition, installing K-Tips requires an experienced professional as the process involves the use of heat.
You should not try to install K-Tip extensions by yourself at home; otherwise, you risk messing up your hair with the thermal tool used to melt the Keratin tips.
2. They Are Expensive
Every good thing comes at a cost, and K-Tip extensions are no exception. Though the prices of K-Tip extensions vary, installation is usually the most expensive part of the process.
Besides the labor cost for the 3–5 hours of installation, you also need to factor in reapplication costs every 3–4 months. When you include the removal cost, K-Tip extensions become quite expensive.
3. Possible Damage
K-Tip extensions are easily affected by heat. High temperatures, e.g. from a styling iron, can weaken the bond between your natural hair and the extensions.
They are also affected by dirt and hair products that accumulate around the bonds. Thus, only use recommended hair products and take occasional breaks to avoid dirt and product build-up.
Though we mentioned earlier that K-Tips are risk-free, that is only true if you install Keratin-based bonds. Besides prolonged wearing, unhealthy bonds, e.g. silicone-based ones, can also harm your hair.
How to Install K-Tip Hair Extensions
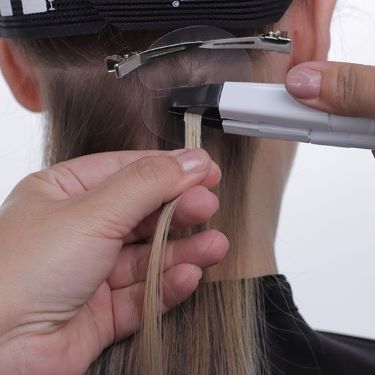
K-Tips installation is a delicate process that requires professional assistance. If you’re up for the task, here’s a simple guide on the entire process, from preparation to installation.
Preparation
Some prep work will go a long way in ensuring you get the perfect look after installing your K-Tip extensions. Therefore:
- Wash the extensions to remove dirt from the factory. This will also help in attaining natural hair texture.
- Blow dry the actual hair and not the Keratin tips as this would melt them.
Steps for Installing K-Tip Hair Extensions
When done with preparation, install the K-Tips by following the steps below:
Step 1: Section the Hair
Start by partitioning the hair into two sections, then secure the upper section with a sectioning clip.
Step2: Place a Heat Protector
Next, insert a section of hair into the heat protector to protect the scalp from heat.
Step 3: Add a K-Tip Extension
After placing the heat protector, align a K-Tip extension with the hair section.
Step 4: Melt the Keratin Bond
Lastly, use an extension iron to fuse your hair and the K-Tip extension. Roll the bond between your fingers before it solidifies for a uniform look.
Repeat the steps across the section.
Maintenance Tips for K-Tip Hair Extensions
Congratulations! You have successfully installed your K-Tip extensions. However, they need proper care and maintenance, otherwise, their lovely appearance will fade. Here are a few ways to properly maintain your K-Tip extensions
1. Wash Your Hair Regularly
Washing your hair carefully is important for your K-Tip extensions’ durability. First, avoid shampoos that contain sulfates, parabens or silicones. They can lead to buildup, tangles and weakening Keratin bonds.
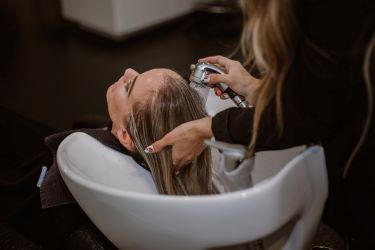
Second, take your time and be gentle when washing your hair. Don’t rub or scrub, as this would weaken the bonds. Instead, use gentle circular motions to work the shampoo from the scalp to the ends.
When done with the shampooing:
- Rinse off the shampoo using warm water. Don’t use hot water since it can weaken the bonds.
- Apply conditioner from halfway going down. Don’t apply the conditioner on the bonds.
- Wait a few minutes, then rinse your hair again using warm water.
Lastly, apply the same caution levels when it comes to drying your hair. Don’t rub, twist or wring your wet hair. Instead, use a towel to gently squeeze the water from your hair. If you decide to use a hair dryer, ensure it’s on low heat to avoid damaging the bonds.
2. Proper Hair Conditioning
Proper conditioning will keep your hair soft, smooth and moisturized for long. Use leave-in conditioners designed for extensions and avoid anything containing sulfates. To be safe, use conditioners with natural ingredients such as argan or coconut.
To properly condition your K-Tip extensions, begin by cleaning your hair using a sulfate-free shampoo. Next, rinse your hair with warm water, then use a towel or hair dryer on low heat to dry it.
When it’s dry, apply the leave-in conditioner starting from the ends, moving up. Don’t oil the Keratin bonds; otherwise, they will weaken, resulting in loose extensions. Use a detangling or wide-tooth brush to distribute the conditioner evenly.
3. Be Gentle When Brushing
How you brush your K-Tip extensions also affects their quality and longevity. Always be gentle and use the right brush to prevent damage. To prevent your hair from tangling, start brushing your hair from the ends moving up using a soft-bristled brush.
In addition, try to brush your hair in small potions to avoid unnecessary pulling or tugging on your K-Tip extensions. If the portion is extra tangled, brush it while holding it with the free hand to avoid ripping off the bonds.
4. Minimize Heat Styling
Heat styling is a common cause of damage to K-Tip extensions. High temperatures can weaken the bonds between your natural hair and the extensions, causing shedding and tangling.
The best way to avoid heat-related damage is to completely avoid heat-styling tools. Instead, use alternative methods such as foam rollers or air-drying. If you must use heat, make sure the temperature is below 350 °F (175°C), and only use tools that distribute heat uniformly.
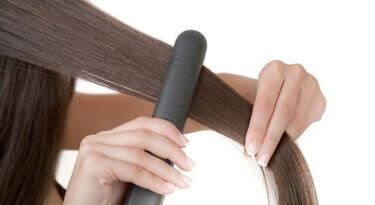
Another trick to reduce heat damage is never to expose the Keratin bonds to direct heat. When using heat-styling tools, first apply heat-protectants and only focus on your hair as you move to the ends.
5. Don’t Sleep With Wet Hair
Yes, how you sleep can also affect your K-Tip extensions. Never sleep with wet hair if you want to stop your extensions from tangling and matting. Instead, use a towel or hair dryer on low setting to completely dry your hair before you go to bed.
Additionally, tying your hair in a low ponytail or braids also helps in preventing tangling while you’re sleeping. You can also invest in soft materials like silk or satin pillowcases that are gentle on hair.
6. Regular Servicing
Visiting your hairdresser every 4–6 weeks for re-adjustments and trimming is crucial in maintaining the natural look. Regular checks ensure your extensions remain securely attached to your hair and that they align correctly.
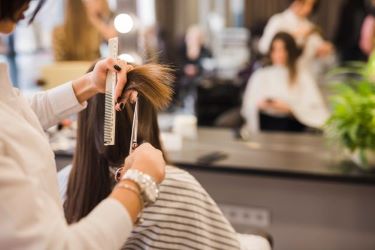
In addition, your hairdresser will get the chance to assess the bonds and remove grown-out or damaged extensions that would spoil your elegant style.
How to Remove K-Tip Hair Extensions
Now that you know how to install and care for K-Tip hair extensions, let’s talk about the last stage of having K-Tips; how to remove them.
K-Tip Extensions Removal Tools
- Hair clips
- Hair extension pliers
- Keratin remover
- Detangling spray
Steps for Removing K-Tip Extensions
Step 1: Separate K-Tips Sections
Start by separating the section without K-Tip extensions, then secure it with a hair clip.
Step 2: Add Keratin Remover
Now, add Keratin remover to the Keratin bonds in the whole row. Gently squeeze each Keratin bond repeatedly and in different sections. Add more Keratin remover if necessary.
Step 3: Remove the K-Tip Extension
When the bond cracks, pull the K-Tip extension. Lastly, apply detangling spray on the hair, then gently comb to remove tangles and remains of the Keratin bond.
Repeat the steps for the remaining K-Tip extensions.
Frequently Asked Questions About K-Tip Hair Extensions
1. How Much Do K-Tip Extensions Cost?
K-Tip hair extensions can cost between $800 to $3,000, depending on your location, hair length, volume and texture. For an actual price, consult your hairdresser.
2. Can You Reuse K-Tip Extensions?
Yes, you can reuse K-Tip extensions. However, reusing K-Tip extensions mostly depends on the quality and how well they are maintained the first time.
3. Can You Swim With K-Tip Extensions?
No, you should not swim with your K-Tip hair extensions. Swimming pools contain chlorine that can weaken the Keratin bonds, resulting in loose extensions. If you have to swim, wear a swim cap to protect your extensions from the chlorine.
4. How Many Packs of K-Tips Do I Need?
You need approximately 5–6 packs of K-Tip hair extensions, depending on the thickness of your hair. Factors such as hair length and volume can also affect the number. Consult your hairdresser for the exact number of packs needed.
Final Thoughts
K-Tip hair extensions are popular because they are flexible and durable. The Keratin tips are tiny and smoothly blend with natural hair, resulting in a natural look. With proper maintenance, you can wear your K-Tip extensions for months without anyone noticing.
If K-Tips sounds like what you are looking for, then give them a try. Visit your hairdresser for advice on the brands, installation and maintenance tips.


