Plucking a lace wig can be a good way of achieving a natural hairline and parting.
This hack removes excess hair around the frontal, making wigs look more natural. No one will notice that it isn’t your real hair.
However, the lace closure usually has a bunch of little black dots that can appear unnatural. Therefore, it would be best to bleach the knots first and then pluck the hairline.
Below, we outlined simple customization steps to help you effortlessly pluck your wig.
Let’s begin!
The Tools You Need to Pluck a Wig
- Tweezers
- Pins
- Hair clips
- Mannequin head
- Rattail comb
- Wig brush
4 Easy Steps to Pluck a Wig for Beginners
Wigs that are not plucked portray straight hairlines that make them look unrealistic. A plucked wig, on the other hand, looks natural, just like your bio hair. Here are a few steps a wig plucker or beginners should follow during the process.
1. Secure the Wig
To begin, secure your wig to a mannequin head using pins. This will ensure your wig stays firm without sliding around during plucking. Otherwise, you might end up with a disfigured hairline.
Moreover, ensure you use enough pins to avoid ripping or tearing the lace when plucking the hair strands.
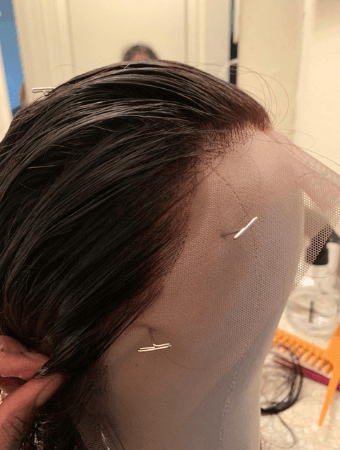
Note: You can decide whether to pluck dry or wet hair. Some prefer dry hair because it offers a sense of density and accurately depicts what the hair will look like after plucking. Although, other people prefer to pluck on wet hair as it is easier to move and control. It’s all a matter of personal preference.
2. Brush the Hair
Apply some styling mousse to the wig hairline and massage gently. Applying mousse will make the hair easier to tweeze.
Also, use a wig brush to comb the whole wig well, and ensure there aren’t any tangles or knots to make the process easier.
Then, brush the hair backward to create a base for your hairline. Now go ahead and clip the rest of the hair away so you can see the entire hairline.

3. Pluck the Hairline
At this point, you should take your time, be patient and go slowly.
You want to ensure that you are plucking the strands, not ripping the lace. A rushed hairline will appear sloppy and messy, which is one thing you want to avoid.
Therefore, you can proceed by following these instructions:
3.1 Customize the Temple
Start by using a rattail comb to part the hair on either side where the temple area would lie on the frontal. Make sure you shape the partings well to mimic the natural temple on your head. Then use a tweezer to pluck all the hair you sectioned off on either side. [1]
You should grip the hair close to the roots without grabbing the lace closure so you don’t cause any tears.
Afterward, evaluate the hairline and see if there is a need to section and pluck more hair from the temple area.
Note: Some frontal wigs come with naturally shaped hairlines, so you may not need this step.

3.2 Pluck the Hairline
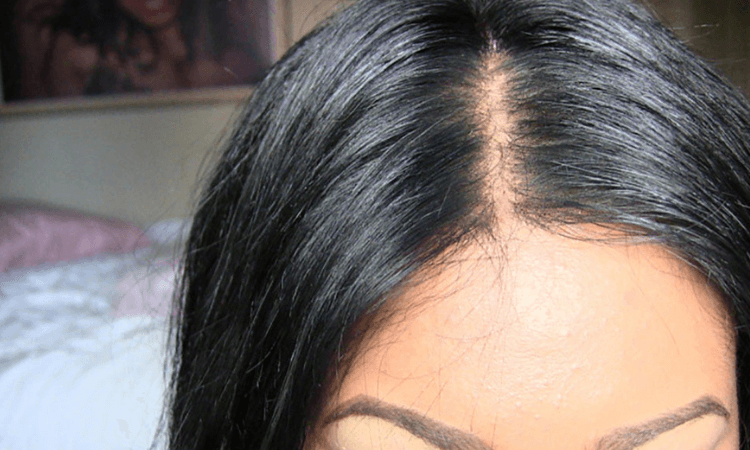
The next step would be to thin out the hairline. To achieve a good result, you will have to pluck various layers of hair or random rows of each part.
This produces a gradient effect such that the hairline looks uniform and neat.
Begin by sectioning hair on one side of the wig’s frontal. The part should be at least one inch into the hairline. Then clip away excess hair so it stays out of the way when plucking.
Once you part the hair, pluck every other hair from the very front. Move 1-2 mm down every point you pluck. In simple terms, it is best not to skip more than 3-4 hair strands at a time.
Ensure you don’t over-pluck by concentrating on one area or a straight line for a long time. This may cause the part to be a bald spot.
3.3 Begin the Next Section
Subsequently, continue plucking until you reach the end of the parted section. After finishing, comb away the excess hair, flip it forward and begin on the next section.
Go ahead and part a small line from the area you just plucked, and then use the exact plucking method in the following section.
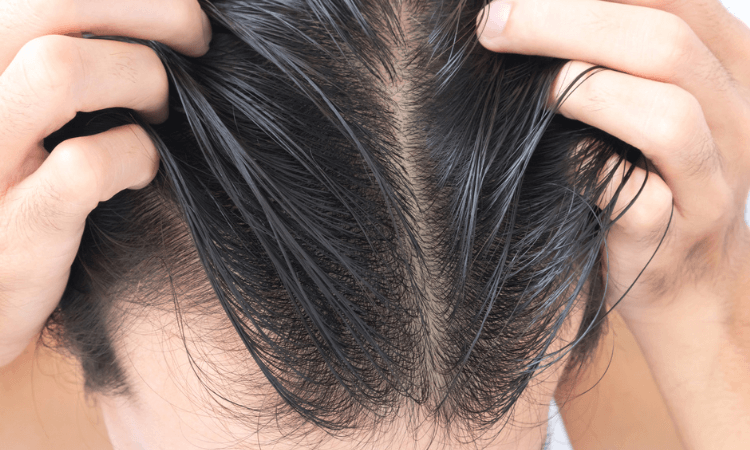
Do so with additional layers of hair until the entire front of the wig looks less dense. Depending on your preference, you can pluck three to four layers of hair.
Besides, you can take a picture of your hairline and replicate that on the wig. Pluck and step back to look at it from a different angle and confirm that you did not over-pluck.
If you have a thinner natural hairline, making the wig’s hairline a little thinner and sparse is better.
3.4 Repeat the Procedure
Repeat this process around the entire hairline until you get satisfied with the look. Once you complete, apply mousse around the hairline and brush again.
Note: I recommend this method because it gives a sense of direction. You will end up with a more satisfactory outcome. Otherwise, when you pluck the hairline randomly, you might end up with inconsistent results.
4. Create Baby Hair
You can customize the hairline further to give your wig its baby hair. Baby hairs can create an illusion of natural hair growth along the hairline to give you a more realistic look.
However, this is a personal choice; you can skip this part if you don’t prefer a wig with baby hair.

To begin, part a very thin section of hair around the hairline and apply mousse to make it easy to manipulate. Then comb the hair down flat to define the part clearly.
Next, pull a small section of hair between your fingers and cut using a sharp pair of scissors. Comb through to remove excess hair. Then use a brush and a styling gel to lay your edges.
Final Thoughts
At this point, you can now pluck a wig to achieve a more natural hairline and wear it confidently. Executing the plucking technique correctly will take a lot of patience and endurance. However, you can also buy quality pre-plucked lace wigs to save you the hassle.


